ATF 610,505,510 Unlock v10.40 Update!! Public Disscussion Thread

Release Date: November 27, 2013 Firmware Version Required : 10.3.80
[ATF JTAG]
* Unlock Lumia WP7 Phones via Reading PIN and PUK Codes
Supported Models: Lumia 610 : RM-835 Lumia 610 : RM-849 Lumia 610C : RM-835 Lumia 510 : RM-889 Lumia 510 : RM-898 Lumia 505 : RM-923
* Boot Repair WP7 Phones
Supported Models: Lumia 610 : RM-835 Lumia 610 : RM-849 Lumia 610C : RM-835 Lumia 510 : RM-889 Lumia 510 : RM-898 Lumia 505 : RM-923
* Factory Boot Repair Cherry Mobile Phones
Supported Models: Skyfire 2.0 Flame 2.0 Flare (S100) - Updated with Corrected JTAG Pinouts Download AFP Files Here: http://www.4shared.com/folder/RLAWF5-j/CHERRY_MOBILE.html
* New ATF JTAG Exe version 1.04 ATF JTAG is Now Automatically Activated if ATF Box has 39 ATF JTAG Credits
[WP7 eMMC TP]
* Added 610 Qualcomm OSBL write via eMMC TP * Added 610C Qualcomm OSBL write via eMMC TP
[WP7 eMMC Direct]
* Added PERMANENT UNLOCK for WP7 Phones Unlocked via PIN or PUK Codes (Disable RE-Locking) Supported Models: Lumia 800 - Qualcomm OSBL must be written to phone first (via USB Flashing) Lumia 800C - Qualcomm OSBL must be written to phone first (via USB Flashing) Lumia 710 - Qualcomm OSBL must be written to phone first (via USB Flashing) Lumia 610 - Qualcomm OSBL must be written to phone first (via JTAG or eMMC TP) Lumia 610C - Qualcomm OSBL must be written to phone first (via JTAG or eMMC TP) Lumia 510 - Qualcomm OSBL must be written to phone first (via JTAG or eMMC TP) Lumia 505 - Qualcomm OSBL must be written to phone first (via JTAG or eMMC TP) * Added Restore DLOAD to Lumia 610 * Added Restore DLOAD to Lumia 610C

[General Updates]
* Complete Product Listing in Nokia.ini as of November 27, 2013) * Complete WP7/WP8 Variant Listing as of November 27, 2013
[Bug Fixes]
* Removed eMMC Communication Debug Messages * Removed WP7 Communication Debug Messages
Who will buy this if you can get more in ATF?


Octoplus Box JTAG Software v1.4.2 - Xperia Miro series full phone repair and more

Octoplus Box JTAG Software v1.4.2 Release Notes
  • Added support for the following models:
- Sony ST23a - added Dead Boot Repair and world's first Phone Repair (Dead Boot Repair + Security Recalculation)!
- Sony ST23i - added Dead Boot Repair and world's first Phone Repair (Dead Boot Repair + Security Recalculation)!
- Sony ST23a2 - added Dead Boot Repair and world's first Phone Repair (Dead Boot Repair + Security Recalculation)!
- Sony ST23i2 - added Dead Boot Repair and world's first Phone Repair (Dead Boot Repair + Security Recalculation)!
- Samsung SGH-A777 - added Dead Boot/Device Repair (thanks to Mr. Dr_Wolodya).
- LG E986 - added Dead Boot Repair.
- LG E989 - added Dead Boot Repair.
  • All pinouts and Repair procedures are described in Software manuals
    ("Help" button in the Software).

Note! after Phone Repair operation, you need to re-flash the phone with any suitable for Sony devices
servicing tool that uses original Sony loaders (with Octopus/Octoplus Suite Software, for example ).

Also Note! after Phone Repair procedure, your phone will have "00000000000000" IMEI
and will be locked; to perform Unlock / Repair IMEI use Octopus/Octoplus Suite Software.


More info and discussion are HERE

Octoplus Box JTAG Software v1.4.2 - Xperia Miro series full phone repair and more


Octoplus Box JTAG Software v1.4.2 is out!

Added world's first full Phone Repair for:
Sony Xperia Miro ST23a, ST23i, ST23a2, ST23i2 and more!

Octoplus Box JTAG Software v1.4.2 Release Notes

Added support for the following models:
- Sony ST23a - added Dead Boot Repair and world's first Phone Repair (Dead Boot Repair + Security Recalculation)!
- Sony ST23i - added Dead Boot Repair and world's first Phone Repair (Dead Boot Repair + Security Recalculation)!
- Sony ST23a2 - added Dead Boot Repair and world's first Phone Repair (Dead Boot Repair + Security Recalculation)!
- Sony ST23i2 - added Dead Boot Repair and world's first Phone Repair (Dead Boot Repair + Security Recalculation)!
- Samsung SGH-A777 - added Dead Boot/Device Repair (thanks to Mr. Dr_Wolodya).
- LG E986 - added Dead Boot Repair.
- LG E989 - added Dead Boot Repair.
All pinouts and Repair procedures are described in Software manuals
("Help" button in the Software).

 Note! after Phone Repair operation, you need to re-flash the phone with any suitable for Sony devices
servicing tool that uses original Sony loaders (with Octopus/Octoplus Suite Software, for example ).

Also Note! after Phone Repair procedure, your phone will have "00000000000000" IMEI
and will be locked; to perform Unlock / Repair IMEI use Octopus/Octoplus Suite Software.

Hint: Unlock of Sony Xperia devices now starts at only 1 credit per UNLOCK!
Download Octoplus Box JTAG Software v1.4.2

Octoplus-Octopus Box LG Software v1.3.8 released Welcome LG G2 on board


Octoplus/Octopus Box LG v1.3.8 is out!

Added world's first support for LG G2 series:
LG D800, D801, D802, D803, D805, D806 and more!

Octoplus/Octopus Box LG Software v1.3.8 Release Notes
  • Added world's first support for LG G2 series:
- D800 - added world's first Direct Unlock, Repair IMEI, Repair Security, Repair Wi-Fi MAC Address, Repair BT Address,
- D800 - Write Security Backup, Read/Write/Repair NVM, Root Device, Reset Screen Lock
- D800 - (including Reset Password, Pin, Pattern, Face, Google locks).
- D800P - added world's first Direct Unlock, Repair IMEI, Repair Security, Repair Wi-Fi MAC Address, Repair BT Address,
- D800P - Write Security Backup, Read/Write/Repair NVM, Root Device, Reset Screen Lock
- D800P - (including Reset Password, Pin, Pattern, Face, Google locks).
- D801 - added world's first Direct Unlock, Repair IMEI, Repair Security, Repair Wi-Fi MAC Address, Repair BT Address,
- D801 - Write Security Backup, Read/Write/Repair NVM, Root Device, Reset Screen Lock
- D801 - (including Reset Password, Pin, Pattern, Face, Google locks).
- D801BK - added world's first Direct Unlock, Repair IMEI, Repair Security, Repair Wi-Fi MAC Address, Repair BT Address,
- D801BK - Write Security Backup, Read/Write/Repair NVM, Root Device, Reset Screen Lock
- D801BK - (including Reset Password, Pin, Pattern, Face, Google locks).
- D801HW - added world's first Direct Unlock, Repair IMEI, Repair Security, Repair Wi-Fi MAC Address, Repair BT Address,
- D801HW - Write Security Backup, Read/Write/Repair NVM, Root Device, Reset Screen Lock
- D801HW - (including Reset Password, Pin, Pattern, Face, Google locks).
- D801Z - added world's first Direct Unlock, Repair IMEI, Repair Security, Repair Wi-Fi MAC Address, Repair BT Address,
- D801Z - Write Security Backup, Read/Write/Repair NVM, Root Device, Reset Screen Lock
- D801Z - (including Reset Password, Pin, Pattern, Face, Google locks).
- D802 - added world's first Direct Unlock, Repair IMEI, Repair Security, Repair Wi-Fi MAC Address, Repair BT Address,
- D802 - Write Security Backup, Read/Write/Repair NVM, Root Device, Reset Screen Lock
- D802 - (including Reset Password, Pin, Pattern, Face, Google locks).
- D802T - added world's first Direct Unlock, Repair IMEI, Repair Security, Repair Wi-Fi MAC Address, Repair BT Address,
- D802T - Write Security Backup, Read/Write/Repair NVM, Root Device, Reset Screen Lock
- D802T - (including Reset Password, Pin, Pattern, Face, Google locks).
- D802TR - added world's first Direct Unlock, Repair IMEI, Repair Security, Repair Wi-Fi MAC Address, Repair BT Address,
- D802TR - Write Security Backup, Read/Write/Repair NVM, Root Device, Reset Screen Lock
- D802TR - (including Reset Password, Pin, Pattern, Face, Google locks).
- D803 - added world's first Direct Unlock, Repair IMEI, Repair Security, Repair Wi-Fi MAC Address, Repair BT Address,
- D803 - Write Security Backup, Read/Write/Repair NVM, Root Device, Reset Screen Lock
- D803 - (including Reset Password, Pin, Pattern, Face, Google locks).
- D805 - added world's first Direct Unlock, Repair IMEI, Repair Security, Repair Wi-Fi MAC Address, Repair BT Address,
- D805 - Write Security Backup, Read/Write/Repair NVM, Root Device, Reset Screen Lock
- D805 - (including Reset Password, Pin, Pattern, Face, Google locks).
- D806 - added world's first Direct Unlock, Repair IMEI, Repair Security, Repair Wi-Fi MAC Address, Repair BT Address,
- D806 - Write Security Backup, Read/Write/Repair NVM, Root Device, Reset Screen Lock
- D806 - (including Reset Password, Pin, Pattern, Face, Google locks).
- D500 - added Write Firmware.
- D500BK - added Write Firmware.
- D500BKGO1 - added Write Firmware.
- MS500 - added Write Firmware.
  • All supported operations are described in details in Software manuals ("Cable & Manual" button in the software).
Note: to perform Direct Unlock/Repair IMEI/Repair Security/Write Security Backup/Write NVM/Repair NVM operations for mentioned above D80x phones it is necessary to Root the phone first.
Autoroot operation is included in the Software for all tested firmwares.
If the phone will not be rooted by the Software automatically, you need to Root the device manually.
 

http://www.youtube.com/watch?v=DrfUyei5HTw

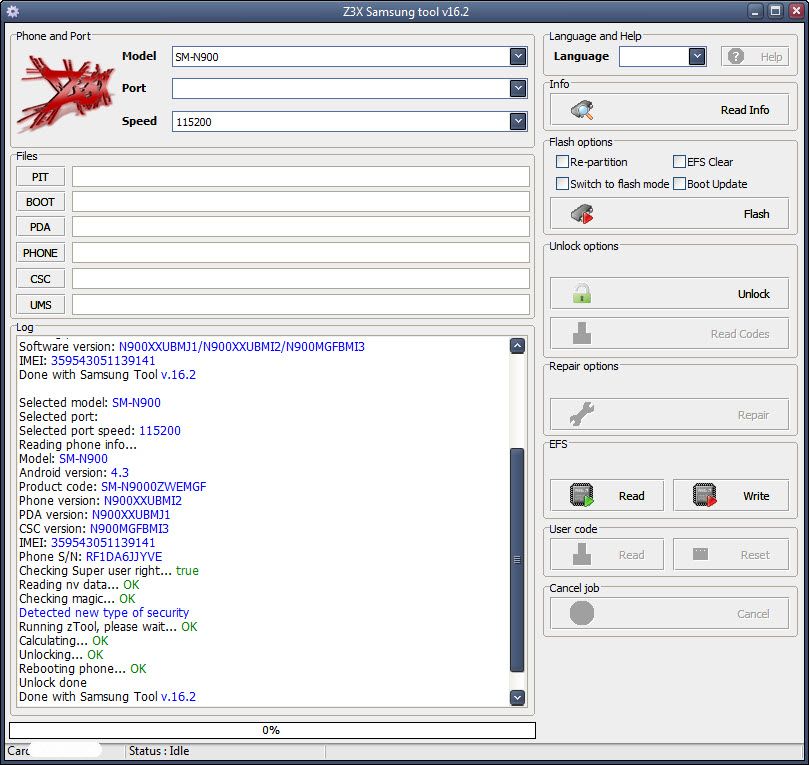
Samsung N900 unlock ok by Z3x 100% working

Quote:
Selected model: SM-N900
Selected port:
Selected port speed: 115200
Reading phone info...
Model: SM-N900
Android version: 4.3
Product code: SM-N9000ZWEMGF
Phone version: N900XXUBMI2
PDA version: N900XXUBMJ1
CSC version: N900MGFBMI3
IMEI: xxxxxxxxxxx9141
Phone S/N: RF1DA6JJYVE
Checking Super user right... true
Reading nv data... OK
Checking magic... OK
Detected new type of security
Running zTool, please wait... OK
Calculating... OK
Unlocking... OK
Rebooting phone... OK
Unlock done
Done with Samsung Tool v.16.2

Unlock, m? m?ng, gi?i mã Samsung galaxy Note 3 N900 xách tay t?i Vietfones mobile - YouTube

Nokia Asha 303 Mic Not Working Problem Solution Jumpers ways

If you are facing mic problem low voice or not voice out going to destination then this diagram will help you to solve mice problem in nokia asha 303. In diagram bellw you can see a mic that is defined with red boarder and some parts are also defined with red line boarder.

So we have to check all these parts that are in red board to solve mic problem and mic not working problem in nokia asha 300.check mother board vary carefully if there is any rust carbon or water damage issue. Clean mother board form these areas and apply some heat with hot air so that mother board of nokia asha 303 can be dry.
If with only service it can not be solved change mic and you can remove mic with hot air or solding iron. In nokia asha 300 mic has 4 points itself and one is ground other are data clock points. so we can apply jumpers in these point.
for more detail and new tips and tricks about cellphone service problem keep visiting this page we will update cellphone service diagrams timely with new cellphone diagrams.some related post are also given bellow you can read them also for more information about cellphone.

Nokia Asha 300 Keypad Not Working Problem Solution Jumpers ways

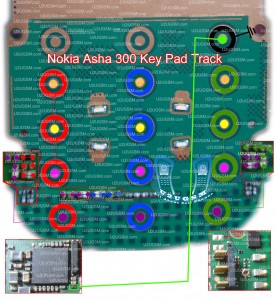
If any, all or a few keys not working in nokia asha 300 then this post will help you to solve all keypad not working problems easily and in a quick way. Simply look at diagram bellow and check all the track and links as shown in it.

Once you check with meter if any of them is broken make these jumpers and your problem will solve easily. All same color keys outer and inner are to define same link ways. If a single key is not working we can apply jumper form other key that have same color for outer or inner.
Some key are going to resistance and capacitors in diagram so we have to apply jumpers on those places and parts. In diagram above a few small diagrams have red border and these are zoom images of the board so that you can see parts vary clearly.
So zoom diagram are only to show close up of board. The diagram above also contain on off button ways in it.
for more detail and new tips and tricks about cellphone service problem keep visiting this page we will update cellphone service diagrams timely with new cellphone diagrams.some related post are also given bellow you can read them also for more information about cellphone.

Nokia Asha 311 Not Charging Problem Solution Jumper Ways solution here

Problem:-
Not Charging in Nokia Asha 311, Charger Not Supported, Charger not working in Nokia Asha 311, Fack charging.
Tools:-
Extra Charger for diagnostic.
Nokia Key T4 and T5 for disassemble.
Electronics Cleaner for cleaning carbon or water damages.
Hot air to dry the mother board.
Solding Iron for applying jumpers.
Nokia Asha 311 Not Charging Problem Solution Jumper Ways

Solution & Diagnostics:-
Plugin charger pin into charging jack of nokia Asha 311.
If charger is not working and you do not see any error at Nokia Asha 311 screen it can be due to missing component or damaged.
If the error is Not charging or charger not supported it can be cause of charging ic and missing values.
Disassemble the mobile phone and look at the mother board.
Change charging pin and try again if above steps do not solve charging problem try bellow.
If there is some rust or carbon then apply electronics cleaner and clean it.
Apply hot air to make it dry and test again.
Different color lines are given to indicate whole track and paths of charging function in Nokia Asha 311.
Check all points that are described in above diagram and if any track out of them is missing apply jumpers as shown in above diagram for solving charging problem in Nokia Asha 311.
You may have to change charging IC.
Warnings & Tips:-
Do not apply much heat with hot air it can be harm for your skin.
Apply jumpers carefully so that it would not be short with other.
After cleaning with cleaner make it dry proper.
for more detail and new tips and tricks about cellphone service problem keep visiting this page we will update cellphone service diagrams timely with new cellphone diagrams.some related post are also given bellow you can read them also for more information about cellphone.

Nokia Asha 311 Power Button On Off Switch Not Working Problem

if you have a Nokia Asha 311 dead they may can have a power switch on off problem so please in first step plug in a charger and if Nokia Asha 311 is charging proper and well but not getting on it means the main problem can be power switch on off fault.
Nokia Asha 311 Power Button On Off Switch Not Working Problem

so for this you have to change power switch button on off button in Nokia Asha 311 if prints are also damge in Nokia Asha 311 for on off button then here is a full path and track for power switch button in diagram that is attached with this post so check all this path and track for power switch on off button in Nokia Asha 311 and if any of these links broken than make these jumpers as shown in diagram with red line while blue color is indicated for ground print.
for more detail and new tips and tricks about this problem keep visiting this page we will update it timely with new diagrams.some related post are also given bellow you can read them also for more information.

Nokia Asha 311 Mic Problem Jumpers Ways Solution

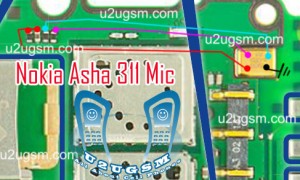
if Nokia Asha 311 have mic problem our voice can not reach to destination and we can not record voice in it.mic problem can be reason of parts damages or carbon rust and water damages.so to solve this issue in Nokia Asha 311 look at diagram bellow and check all these components and parts.these parts are used in Microphone function in Nokia Asha 311.
Nokia Asha 311 Mic Problem Jumpers Ways Solution

once you have dis assembled mobile phone look at board vary carefully and check if there is some rust or carbon.Clean
these parts and area with electronics cleaner and leave it to dry for a few mints with hot air.In above diagram all tracks are given in red and blue colors.these tracks show positive and negative paths of mic parts.so check these components and paths with electronics miter and if path missing apply jumpers.
Because mic is attached with board so you can remove it with solding iron by applying much solder on mic and then slip it once it is too hot.And use new mic to fix mic problem in Nokia Asha 311.
for more detail and new tips and tricks about cellphone service problem keep visiting this page we will update cellphone service diagrams timely with new cellphone diagrams.some related post are also given bellow you can read them also for more information about cellphone.

Nokia Asha 300 Ringer Problem Solution jumpers

Nokia Asha 300 ringer problem can be solve with a few steps that are given in diagram bellow so look at diagram bellow to solve love ringer voice, no ringer tones, no ringer working problems in nokia asha 300.in diagram there are two colors blue and red both colors are defining path of circuit in mobile phone.

Check ringer and if ringer do not show continuity or a good value with meter then change ringer with new one. Check points on board where ringer have to attaché after put in casing housing.
Then check all these paths as shown in diagram above and if any of them is broken or missing components then apply jumpers as described above. Small circle shows positions where we are able to make jumpers. in these place we can apply jumpers to solve ringer problem in nokia asha 300.
for more detail and new tips and tricks about cellphone service problem keep visiting this page we will update cellphone service diagrams timely with new cellphone diagrams.some related post are also given bellow you can read them also for more information about cellphone.

Nokia Asha 300 Power button On Off Switch Ways Jumpers Dead Problem Solution

Some time nokia asha 300 can be dead due to on off button problem. If on off button is not working in nokia asha 300 then it can not power on. So to solve this problem we have to follow a few steps that are given bellow and have to follow diagram bellow also.

Nokia Asha 300 Power button On Off Switch Ways Jumpers Dead Problem Solution To check that it is button fault we can make a simple test plug in charger and check is it working in off mode if you can see nokia asha 300 is charging ok in off mode then it means set is not totally dead. And problem is only that mobile can not become power on.
So remove key pad striker and check is there any rust carbon or water damage on off button if yes clean it and change the push of button. Check links with meter and if on off button does not show value outer is a ground you can apply jumper on any ground print. While inner is a positive print and going to resistance back of mother board. Apply jumper as shown in diagram in red color.
for more detail and new tips and tricks about cellphone service problem keep visiting this page we will update cellphone service diagrams timely with new cellphone diagrams.some related post are also given bellow you can read them also for more information about cellphone.

Nokia Asha 300 Speaker Problem Solution jumpers

Nokia Asha 300 Speaker problem can be solve with a few steps that are given in diagram bellow so look at diagram bellow to solve love Speaker voice, no Speaker tones, no Speaker working problems in nokia asha 300.in diagram there are two colors blue and red both colors are defining path of circuit in mobile phone.

Check Speaker and if Speaker do not show continuity or a good value with meter then change Speaker with new one. Check points on board where Speaker have to attaché after put in casing housing.
Then check all these paths as shown in diagram above and if any of them is broken or missing components then apply jumpers as described above. Small circle shows positions where we are able to make jumpers. in these place we can apply jumpers to solve Speaker problem in nokia asha 300.
for more detail and new tips and tricks about cellphone service problem keep visiting this page we will update cellphone service diagrams timely with new cellphone diagrams.some related post are also given bellow you can read them also for more information about cellphone.

Nokia Asha 311 Volume and Lock Keys Not working Jumpers solutione here

Nokia Asha 311 Volume and Keypad lock keys problem can be solve with a few steps and jumpers that i am going to teach in this post and given in diagram bellow.So following these tips and tricks we can solve volume and keypad lock key lock keys easily.
Nokia Asha 311 Volume and Lock Keys Not working Jumpers
If volumes are not working we will not be able to volume up or down we also can not use keypad if keypad lock button is not working in Nokia Asha 311.So look at above diagram and clean all these parts that are given in it.
Apply heat to so that it can be dry for a few mint.Do not apply much heat because it can harm your skin and may can damage mother board also.
Check all these tracks that are given in repairing diagram and if any of them is missing apply jumpers as shown in it.If any button switch or part is damage you can replace it with new one.
for more detail and new tips and tricks about cellphone service problem keep visiting this page we will update cellphone service diagrams timely with new cellphone diagrams.some related post are also given bellow you can read them also for more information about cellphone.

HTC Desire 300 User Guide Manual Free Download Now

Download HTC Desire 300 User Guide Manual Free
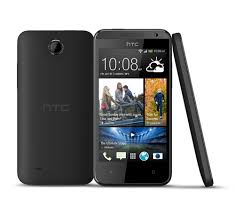
All Advanced affordable, HTC Desire 300 offers the latest features of smartphones to monitor without breaking your budget. Vibrating screen with the home screen always refreshing, HTC Music Channel, and the speed of fast navigation.
Download HTC Desire 300 User Guide Manual Free
Stay minute. Automatically update the home screen is updated every time you turn it on. Read the latest blogs, social networking messages , sports scores , news and much more . Whenever you look.
Audio captivating. Clear vocals and deep bass for music that comes alive .
Impressive display . Detailed images , bright colors , and videos in full rolling and beautiful photos.
HTC Home screen continuously transmits the BlinkFeed ™ custom content to your phone. With the most sought after applications and sources of popular content , you’ll stay in the loop with your social network, favorite blogs , news, sports scores and more. Select the Home screen BlinkFeed you want , and stay a minute glance.
You feel like you’re sitting in the studio for final assembly . And with HTC Music Channel , you can see the lyrics in sync with your music audio sensory experience of a – of a kind * .
* Database support based on the contents of the actual songs .
4.3 Functions of the entire display bearing ” saturated colors , rich visual effects and detailed graphics for a smartphone experience that will improve your web browsing and video playback.
Superb picture quality , web browsing and fast connectivity bulbs ™ powered by a Qualcomm Snapdragon ® processor with powerful dual-core processor with your mobile every son chain experience.

HTC Desire 300 user manual,HTC Desire 300 user guide manual,HTC Desire 300 user manual pdf‎,HTC Desire 300 user manual guide,HTC Desire 300 owners manuals online,HTC Desire 300 user guides,

Full Unlock for Lumia 710 & 800 tested here solution

INSTRUCTIONS

Requires an unlocked bootloader (a.k.a. qualcomm development bootloader).
Easy to check: Turn the phone OFF, then press and hold VOLUME UP + POWER until you notice a short vibration. Plug in to the computer. If the phone turns up in disk mode (USB Mass Storage Device), then you have an unlocked bootloader. IF you're in Windows, it will ask if you want to format the disk. SAY NO OR IT WILL EXPLODE (it won't explode but you might break it)
If the device detected by the computer is Nokia DLOAD you have a locked bootloader and you're out of luck, at least for now.
but it's more involved to find the appropiate partition:
dd if=./os-new.nb of=/dev/sdX9
Where X is the disk detected by your linux distribution.
After that, you'll need to hard reset the phone. Hold Power button for 10 seconds to exit Qualcomm's disk mode, and press and hold POWER+VOLUMEDOWN+CAMERA until you feel the phone vibrate. After that, RELEASE power button but KEEP HOLDING volume down + camera for five or more seconds. This will trigger the hard reset.

Lumia 800: Full Unlock
sdb3.rar: Flash it to PARTITION #3. It contains 12070's amss & adsp. Not absolutely required but if you have an older version this should give you better battery life.
sdb3.rar
OS-NEW:
As always, flash it to PARTITION #9.
Part1: os-new.part1.rar
Part2: os-new.part2.rar
Part3: os-new.part3.rar
Part4: os-new.part4.rar

Alternate ROM with Full Unlock + Some apps:
Part1: FU_12070_with_apps.part1.rar
Part2: FU_12070_with_apps.part2.rar
Part3: FU_12070_with_apps.part3.rar
Part4: FU_12070_with_apps.part4.rar
Apps preinstalled:
DS Supertool
File Deployer
Metro Theme
WebServer
WinTT
WM Device Center
WP7 Root Tool

Sptbox deluxe 16.9.8 released

NEWS:

* GT-I9500 IMEI Change/Unlock
* First IN WORLD SM-G3812 Flash/Unlock/Imei
* First in WORLD GT-S7568i Flash/Unlock/Imei
* SM-N9005 Flash
* SM-N9009 Flash
* SM-N900v Flash
* SM-N9009 Flash


Procedure of I9500 imei :
* Phone Should be Rooted.
* After rooting first need check your phone is supported or not.
* For That connect phone to usb with usb debug active
* Mark repair imei and unlock
* And just press spt mode after done.
* Power on Phone and enter *#1234# check CP part if there is say null its mean this phone not support just reflash phone and dont play for imei.
* If CP part is show right mean this phone can change imei for imei follow this step.
* After Root Do Reset Default EFS
* Mark repair imei and unlock.
* Connect Phone uart cable.
* Press Factory mode.
* After progress done connect Phone to usb with usb debug active then press spt mode
* Done Your imei now change and network ok.

Altenative Download Link 1#:

http://support.sptbox.com/SPTCARD1698.rar

Altenative Download Link 2#:

http://support.sptbox2.com/SPTCARD1698.rar

Nokia Asha 311 WiFi Not working Problem Solution Ways

WiFi is used for networking a Smartphone with some other networking devices and it works for VPN (Virtual Private Network ) to gain a high speed broadband speed at you smart phone.
Nokia Asha 311 WiFi Not working Problem Solution Ways
in above diagram you can see a red line that identify parts used in wifi function in Nokia Asha 311.So after disassemble of mobile phone look all these parts very carefully and if there is some rust or water damages clean them with electronics cleaner and apply smoth heat with hot air. do not apply to much air because it can harm your skin and also can damage the mother board.
So re flow resold these parts and if it can not solve problem replace these parts that are given in above diagram.
for more detail and new tips and tricks about cellphone service problem keep visiting this page we will update cellphone service diagrams timely with new cellphone diagrams.some related post are also given bellow you can read them also for more information about cellphone.
Related Posts Plugin for WordPress, Blogger...

All Gsm Solution Headline Animator

Blogger Tips and TricksLatest Tips And TricksBlogger Tricks

Please Log in